Monday, 20 October 2014

Tuesday, 5 August 2014
Start with MongoDB
Ubuntu includes its own MongoDB packages.
Here are the few simple steps I followed to install mongodb on Ubuntu 14.
Here are the few simple steps I followed to install mongodb on Ubuntu 14.
- Import the public key : The Ubuntu package management tools (i.e. dpkg and apt) ensure package consistency and authenticity by requiring that distributors sign packages with GPG keys. Issue the following command to import the MongoDB public GPG Key: sudo apt-key adv --keyserver hkp://keyserver.ubuntu.com:80 --recv 7F0CEB10
- Reload the local package database: sudo apt-get update
- Install latest version of mongodb : sudo apt-get install mongodb-org
- Issue the command to start mongod: sudo service mongod start
This was the basic installation of Mongodb on ubuntu. Will keep on posting as I explore ....
References
References
- http://docs.mongodb.org/manual/tutorial/install-mongodb-on-ubuntu/
Thursday, 22 May 2014
Change your username -UBUNTU
If you want to change your username
Restart in recovery mode and go to the root prompt shell
("Drop to root shell prompt")

Restart in recovery mode and go to the root prompt shell
("Drop to root shell prompt")
- First remount the root
- mount -o remount,rw /
- change the username and home folder name
usermod -l <newname> -d /home/<newname> -m <oldname>- reboot
- Resume normal boot
Wednesday, 21 May 2014
Configure IP of CentOS on virtual box
Once you installed CentOS on virtual box and it's not binded with any IP after issuing the command ifconfig.
Troubleshoot by issuing the following commands
Troubleshoot by issuing the following commands
ifdown eth0
ifup eth0
yum update
It will solve the problem.
Reference :
http://stackoverflow.com/questions/20816133/pycurl-error-6-couldnt-resolve-host-mirrorlist-centos-orgWednesday, 2 April 2014
Troubleshoot- if alt-tab does not switch windows in UBUNTU
If alt-tab is not switching your screen, here is the solution .
Your problem with window manager is solved !! :)
Reference
http://askubuntu.com/questions/135685/alt-tab-does-not-switch
- Open the terminal and install compizconfig-settings-manager
- sudo apt-get install compizconfig-settings-manager
- Or search for
compizconfig-settings-managerin Software Center and install from there. - Then go to system tools > preferences > compizconfig
- Go at the very bottom where it says windows management , Put a checkmark in application switcher.
Your problem with window manager is solved !! :)
Reference
http://askubuntu.com/questions/135685/alt-tab-does-not-switch
Friday, 17 January 2014
Install rabbitvcs, SVN client simillar to tortoiseSVN on Windows
If you are a UBUNTU fan and looking for a svn client, rabbitvcs is a solution. Although I faced some issue while trying to install directly from repository, the nautilus was not showing on right click, after some trial, finally I could set up and installed from the source code by following the steps mentioned below


- sudo apt-get install python-nautilus python-configobj python-gtk2 python-glade2 python-svn python-dbus python-dulwich subversion meld gconf-edit
- sudo apt-get install python-nautilus python-configobj python-gtk2 python-glade2 python-svn python-dbus python-dulwich subversion meld
- wget http://rabbitvcs.googlecode.com/files/rabbitvcs-0.15.2.tar.bz2
- tar jxvf rabbitvcs-0.15.2.tar.bz2
- cd rabbitvcs-0.15.2/
- sudo python setup.py install --install-layout=deb
- cd clients/nautilus-3.0
- sudo cp RabbitVCS.py /usr/share/nautilus-python/extensions/
your are done now !!
Thursday, 26 September 2013
Cron Job to take a daily backup of Database - Postgres
Cron job are used to schedule commands to be executed periodically. You can setup commands or scripts, which will repeatedly run at a set time.
PATH TO POSTGRES/bin/pg_dump -U USERNAME DBNAME > PATH FOR BACKUP FOLDER/$(date '+%Y%m%d')-bkp.sql
0 17 * * * /PATH TO SCRIPT/scriptname.sh
- To edit your crontab file, type the following command at the UNIX / Linux shell prompt:
- Syntax of crontab (Field Description)
1 2 3 4 5 /path/to/command arg1 arg2
OR
1 2 3 4 5 /root/backup.sh
Where,
1: Minute (0-59)
2: Hours (0-23)
3: Day (0-31)
4: Month (0-12 [12 == December])
5: Day of the week(0-7 [7 or 0 == sunday])
/path/to/command - Script or command name to schedule
For example if you want to take a daily backup of your postgres database you can follow the following steps:
- Make entry for user USERNAME for database DATABASENAME as following in the file pg_hba.conf
- local DATABASENAME USERNAME trust
- * make sure that the user has select permission on the database.
- Write a script as following (vi scriptname.sh )
PATH TO POSTGRES/bin/pg_dump -U USERNAME DBNAME > PATH FOR BACKUP FOLDER/$(date '+%Y%m%d')-bkp.sql
- Create a cron job (Take a daily backup at 5 pm)
0 17 * * * /PATH TO SCRIPT/scriptname.sh
Tuesday, 24 September 2013
About Patents search - India
If you want to search the current patents filed in India, you can search using diffrent keywords on the following website
http://ipindiaservices.gov.in/patentsearch/search/index.aspx
It provides an exhaustive list of granted patents, published applications, Application status etc.
For other details you can also check
http://ipindia.nic.in/ipr/patent/patents.htm
Happy Patenting :)
http://ipindiaservices.gov.in/patentsearch/search/index.aspx
It provides an exhaustive list of granted patents, published applications, Application status etc.
For other details you can also check
http://ipindia.nic.in/ipr/patent/patents.htm
Happy Patenting :)
Thursday, 18 July 2013
Android on virtual box
If you want to run Android on you PC, you can install Android ISO in Virtual box. Once installed you can use Android enviornment on your machine install apps on it.
You need to install virtualbox first, which can be downloaded from https://www.virtualbox.org/wiki/Linux_Downloads (I tried it for UBUNTU 12.04)
Then download Android x-86 ISO from http://www.android-x86.org/download
I have tested it for the following settings
- Operating System: Linux – Linux 2.6
- Memory Size: 512 MB
- Hard Drive Size: 3 GB or More
Here is the snap shot of adding Android on virtual box.


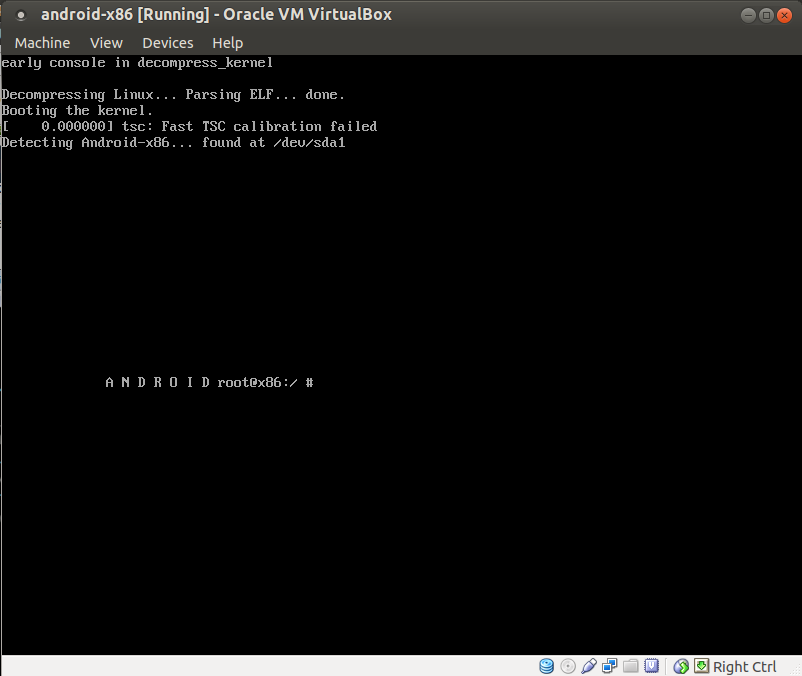
After Installation is complete, reboot it go to devices > CD/DVD Devices remove disk from virtual drive so as to boot normally inplace of getting booted from ISO.
Wednesday, 26 June 2013
"xournal" an excellent pdf editor for UBUNTU
I was looking for a pdf editor in linux and found xournal. This is excellent pdf editor and easy to use.
you can install it by command
you can install it by command
- sudo apt-get install xournal
After it is installed open the pdf file which you want to edit, after you are done you can also export it into pdf.
Thursday, 13 June 2013
My experience - "Member of the panel discussion" at an International Conference
It was two day Conference on 12th-13th June 2013, at Sofitel Hotel, BKC on "The Global high on Cloud summit". It was related to cloud computing and we have recently started a research activity on "Mobile Cloud Computing", so our group head suggested to attend this and get an insight about how the industry is adopting cloud and what issues and challenges are they facing.
On the morning of 13th the session started and I entered into the conference room, looking for a comfortable place to get seated and settled, the moderator of panel discussion had already initiated a panel discussion and this time members were not preplanned, as a Prof of class he started calling up the delegates randomly, my colleague and me were sitting at the last seat, in the age,experience and designation we were the junior most barely having 6+ years of total experience and months of experience in the field of cloud computing, while mostly the CIO's, CTO's, Executive Directors, MD's and all exalted dignitaries that everyone aspire to get added with his name, were present from renowned Industries like IBM, Oracle, Hero Moto Corp, Maruti Suzuki India Ltd, Essar, Sify etc .
Suddenly the moderator asked me to join the panel at the stage "oh No" I whispered as it used to be in the MBA classes (no not me ;)), but this was not the class, I could not say NO I am not prepared or how can I join with u all luminaries, I had to suppress my nervousness and get up with confidence.
I got seated at the Dias with 5 other panelist the Director New India Insurance, Executive Director – IT, JM Financial Services Ltd etc etc. Fortunately they did not asked me to initiate the discussion and one of the member started with what challenges are they facing, which are the issues need to be addressed and issues related to continuity, disaster recovery, availability and security while two of them were talking I got some time to prepare my speech, had a deep breath and gear up. As soon as the second guy finished the moderator said "Let us have the privilege to hear something from the lady ".
After my introduction I started with "As you rightly said about the mobile reaching right up-to the "Paanwala", I would like to continue from there, the mobile has reached to masses but computer has not reached yet, we are looking forward for a solution that can bridge this gap and this is possible with the help of "Mobile Cloud Computing", So the vision is to allow everyone to use their mobile as if they are using a computer system and the solution should be intelligent enough to identify the kind of device, bandwidth, network connectivity etc and scalable enough to match the capacity of the cloud, dynamically call the services of the cloud on to the mobile and on the top of that it has to act like a plugin so as to become convenient for the user to install on his device, be it a low end mobile or high end tablets, For example I should be able to access all the features of Microsoft Power point from my mobile/ tablet itself in the way it works on desktop/laptop" . I brought a lot of questions to be answered and was counter argued by the other members as most of them were having their own cloud set up and they were trying to relate with the client server or thin client kind of architecture for mobile, then I had to convince them how different and usable it would be from client server, definitely a market need to be identified for this but every concept has some niche at the beginning.
Don't know what shape this idea is going to take in future but definitely I am happy that I was able to express my self, could remember something which my group head used to discuss and those exhaustive and difficult research paper from Berkley university had left some impression into my mind :)
On the morning of 13th the session started and I entered into the conference room, looking for a comfortable place to get seated and settled, the moderator of panel discussion had already initiated a panel discussion and this time members were not preplanned, as a Prof of class he started calling up the delegates randomly, my colleague and me were sitting at the last seat, in the age,experience and designation we were the junior most barely having 6+ years of total experience and months of experience in the field of cloud computing, while mostly the CIO's, CTO's, Executive Directors, MD's and all exalted dignitaries that everyone aspire to get added with his name, were present from renowned Industries like IBM, Oracle, Hero Moto Corp, Maruti Suzuki India Ltd, Essar, Sify etc .
Suddenly the moderator asked me to join the panel at the stage "oh No" I whispered as it used to be in the MBA classes (no not me ;)), but this was not the class, I could not say NO I am not prepared or how can I join with u all luminaries, I had to suppress my nervousness and get up with confidence.
I got seated at the Dias with 5 other panelist the Director New India Insurance, Executive Director – IT, JM Financial Services Ltd etc etc. Fortunately they did not asked me to initiate the discussion and one of the member started with what challenges are they facing, which are the issues need to be addressed and issues related to continuity, disaster recovery, availability and security while two of them were talking I got some time to prepare my speech, had a deep breath and gear up. As soon as the second guy finished the moderator said "Let us have the privilege to hear something from the lady ".
After my introduction I started with "As you rightly said about the mobile reaching right up-to the "Paanwala", I would like to continue from there, the mobile has reached to masses but computer has not reached yet, we are looking forward for a solution that can bridge this gap and this is possible with the help of "Mobile Cloud Computing", So the vision is to allow everyone to use their mobile as if they are using a computer system and the solution should be intelligent enough to identify the kind of device, bandwidth, network connectivity etc and scalable enough to match the capacity of the cloud, dynamically call the services of the cloud on to the mobile and on the top of that it has to act like a plugin so as to become convenient for the user to install on his device, be it a low end mobile or high end tablets, For example I should be able to access all the features of Microsoft Power point from my mobile/ tablet itself in the way it works on desktop/laptop" . I brought a lot of questions to be answered and was counter argued by the other members as most of them were having their own cloud set up and they were trying to relate with the client server or thin client kind of architecture for mobile, then I had to convince them how different and usable it would be from client server, definitely a market need to be identified for this but every concept has some niche at the beginning.
Don't know what shape this idea is going to take in future but definitely I am happy that I was able to express my self, could remember something which my group head used to discuss and those exhaustive and difficult research paper from Berkley university had left some impression into my mind :)
Thursday, 25 October 2012
Data replication with Postgresql and Slony using pgAdmin
- Slony-I – introduction:
Slony-I
is a "master to multiple slaves" replication system
for PostgreSQL
supporting cascading (e.g. - a node
can feed another node which feeds another node) and failover.
The big picture
for the development of Slony-I is that it is a master-slave
replication system that includes all features and capabilities needed
to replicate large databases to a reasonably limited number of slave
systems. Slony-I is a system designed for use at data centers and
backup sites, where the normal mode of operation is that all nodes
are available.
- Tools:
Postgres-9.2, PgAdmin 1.16, slon version 2.0.7 on UBUNTU 12.04
- Database setupThe data will be replicated from database source ,public schema with table emp_details to to target databse,public schema and emp_details table.User is postgres, host=localhost both the database are on the same machine (same host and port)
- Replication Process with PgAdminCreate to database “source” and “target” .Create a schema-only dump of the source database, and load it into target.Everything has to be done into the Replication items inside the two newly created databases. The two replication objects need references to each other .

1- Create base replication objects
For the Master :
- Right click on source > Replication and choose "New Slony-I Cluster"
- Join existing cluster : Do not check this !
- Cluster name : choose a name, here it is : REP_CLUSTER
- Local Node Left : 1
- Local Node Right : master_node
- Admin Node Left : 99
- Admin Node Right : admin_node
- Press OK.
For the Slave :
- Right click on target > Replication and choose "New Slony-I Cluster"
- Join existing cluster : Has to be checked
- Server : localhost
- Database : source
- Cluster name : REP_CLUSTER (should be automatically recognized)
- Local Node Left : 10
- Local Node Right : slave_node
- Admin Node : 99 - admin_node
- Press OK.
2 – Create path setup
For the Master :
- Right click on master_node Path and choose New path
- Server : 10 - Slave Node
- Connect Info : host=localhost port=5434 user=postgres password= “” dbname=target
- Conn retry : 10
- Press OK.
For the Slave :
- Right click on slave_node > Path and choose New path on target
- Server : 1 - master_node
- Connect Info : host=localhost port=5434 user=postgres password=”” dbname=source
- Conn retry : 10
- Press OK.
Similarly create path for each node (slave on source and master on
target)
3 – Define replication set on source
- In the Db source > REP_CLUSTER create a Replication Sets and choose new Replication Set
- ID : 1
- Comment : Replication Set 1
Now we choose the table we want to be
replicated from source to target .
- In the Replication Set 1 choose New tables
- Table : Any table of your choice e.g public.details (You will have to select table from the list that you want to replicate.)
- ID : 1
- Index : Auto filled when choosing table. That’s important to have a unique constraint on the table you want to replicate (primary key for instance).
- Comment : a nice comment
- Press OK.
4 – Create a new Subscription (screen caps below)
- Source >Replication Set > Subscription and choose New subscription.
- Origin : write “1”
- Provider : Choose “1 - Master Node”
- Receiver : Choose “10 - Slave Node”
- Can forward : Keep it unchecked
- Press OK.
Now check path and listen are same in source and target of admin
node .If not add master_node (slave_node), slave_node(slave_node) in
the target as well .
Start the replication
Go to slon path
/usr/lib/postgresql/9.2/bin bin (or any other location depending
on your linux flavour and / or Postgresql installation path). Check
that slon is
there in the path. This is the slony daemon you will
start twice : one for the MASTER(source), the other for the SLAVE
(target).
slon syntax :
slon
[Options] [ClusterName] [ConnexionInfos]
For the Master :
- ./slon -d 1 REP_CLUSTER "dbname=source user=postgres
host=localhost port=5434"
For the Slave :
- ./slon -d 1 REP_CLUSTER "dbname=target user=postgres
host=localhost port=5434"
Refer to the sample output of source and target .
Test the Replication
Add some data in the details table of
source database and check whether it is replicated at the target.
Reference:
Wednesday, 17 October 2012
Upgrading pgadmin3 from 1.14 to 1.16
The Ubuntu 12.04 package manager will install pgadmin3 version 1.14 which does not support PostgreSQL 9.2.
Warning:
The server you are connecting to is not a version that is supported by this release of pgAdmin III.
pgAdmin III may not function as expected.
Supported server versions are 8.2 to 9.1.
sudo apt-get remove pgadmin3
Warning:
The server you are connecting to is not a version that is supported by this release of pgAdmin III.
pgAdmin III may not function as expected.
Supported server versions are 8.2 to 9.1.
Remove the current pgAdmin version
sudo apt-get remove pgadmin3
Install pgAdmin version 1.16 using a ppa
sudo apt-add-repository ppa:voronov84/andreyv
sudo apt-get update
sudo apt-get install pgadmin3
sudo apt-get update
sudo apt-get install pgadmin3
Monday, 15 October 2012
Solving the problem of browser and open office after upgrading UBUNTU 12.04 FROM 11.10
After upgrading UBUNTU 11.10 to UBUNTU 12.04
I was getting following error while opening any browser and open office
Error: in load: file "/usr/share/uim/lib/sigscheme-init.scm" not found
Error: in load: file "/usr/share/uim/lib/sigscheme-init.scm" not found
To rectify the issue I installed the following package
sudo apt-get install --reinstall libuim-data
Friday, 28 September 2012
Troubleshhoting while upgrading UBUNTU 11.10
While trying to update to UBUNTU 11.10 I was getting following error:
W:Failed to fetch http://archive.ubuntu.com/ubuntu/dists/dapper/main/source/Sources
All I did I opened /etc/apt/sources.list and commented the following lines :
W:Failed to fetch http://archive.ubuntu.com/ubuntu/dists/dapper/main/source/Sources
All I did I opened /etc/apt/sources.list and commented the following lines :
deb-src http://archive.ubuntu.com/ubuntu dapper main multiverse
deb-src http://archive.ubuntu.com/ubuntu dapper-updates main multiverse
deb http://archive.canonical.com/ lucid partner
deb-src http://archive.canonical.com/ lucid partner
Then System >Administration >UpdateManager
Click Upgrade.Follow the on-screen instructions.
Sunday, 22 July 2012
Upgrade pgadmin ubuntu
You can upgrade pgadmin to it's latest version by using following command.
- sudo apt-add-repository ppa:flexiondotorg/postgres
- sudo apt-get update
- now you can upgrade from synaptic or use sudo apt-get install pgadmin3 to install the latest version.
Thursday, 12 July 2012
Gnome: System Monitor Application To Kill a Process
To start System Monitor GUI, click on System menu > Select Administration > System Monitor. Alternatively, open a command-line terminal (select Applications > Accessories > Terminal), and then type:
$ gnome-system-monitor
now select the process you want to kill and End Process.
To kill from command line option
$ ps aux | grep program_nameps - report a snapshot of the current processes.
To end a process, enter:
$ kill -s 15 PIDWednesday, 13 June 2012
Type in Hindi and other Indian languages using yudit
If you want to type in Hindi ,you can use yudit which is a free software can be downloaded from http://www.yudit.org/download.html.
Yudit is a simple Unicode editor, has Opentype font support for Devanagari, Malayalam & other
indic languages. Inscript & phonetic keymaps are available for typing in Indic.
Install yudit :
You can follow the steps given at the following URLto install yudit.
Yudit is a simple Unicode editor, has Opentype font support for Devanagari, Malayalam & other
indic languages. Inscript & phonetic keymaps are available for typing in Indic.
Install yudit :
You can follow the steps given at the following URLto install yudit.
- http://www.yudit.org/download/binary
- if you have downloaded the zipped folder.Unzip it and go to the folder
2.configure --prefix=/usr/local
3. make
4. make install
Binary RPMs and Windows version is also available.To type in any indian language, you need to only install the font and set the keymap.Yudit only works with Unicode or Opentype fonts.
For Hindi/Marathi download Gargi devanagari opentype font.
To install the font :
Either copy it into .yudit/fonts in your home directory.
$ cd
$ cp Gargi-1.1.ttf .yudit/fonts
or globally in /usr/share/yudit/fonts.
# cp Gargi-1.1.ttf /usr/share/yudit/fonts/
You dont need to do any ttmkfdir/mkfontdir stuff.
Yudit configuration is stored in ~/.yudit/yudit.properties.
Global one is in /usr/share/yudit/config/yudit.properties
In yudit.properties look for line starting with
yudit.font.TrueType=
And add the font file name (eg Gargi-1.1.ttf) to the line, like below
yudit.font.TrueType=Gargi-1.1.ttf,Sampige.ttf,arial.ttf,kochi-gothic.ttf, gulim.ttf,
tsckanna.ttf:tscii, dc-font.ttf,code2000.ttf, code2001.ttf:unicode:RL, cyberbit.ttf,yudit.ttf
Using Yudit http://www.indlinux.org/doc/yuditguide.html
Next you need to set the keyboard input. Start yudit ,
You will get a Window like below.

Font (with "A" icon ) : This should be set to TrueType ( Shift - F2 does it )
Input (right of Font ): Clicking this brings up a dialog as shown below.
The Available list contains list of all supported input methods.
For Indic inscript and phonetic keymaps are defined , of the name lang-inscript or lang-phonetic
where lang is 3 letter code for the language eg Devanagari - dev, Kannada - kan , Telugu - Tel
You can assign one input method to each Function key.
Leaving F1 as straight ( ie english ) you can set you language by , selecting the input map
and funtion key to bind to and click the arrow.

On Windows
If you are using Yudit on windows, assuming you have installed in say C:\Yudit
Your configuration will be in C:\Yudit\config\yudit.properties
And Fonts in C:\Yudit\fonts
Rest all you can follow steps as above.
Snapshot from yudit

References:
Binary RPMs and Windows version is also available.To type in any indian language, you need to only install the font and set the keymap.Yudit only works with Unicode or Opentype fonts.
For Hindi/Marathi download Gargi devanagari opentype font.
To install the font :
Either copy it into .yudit/fonts in your home directory.
$ cd
$ cp Gargi-1.1.ttf .yudit/fonts
or globally in /usr/share/yudit/fonts.
# cp Gargi-1.1.ttf /usr/share/yudit/fonts/
You dont need to do any ttmkfdir/mkfontdir stuff.
Yudit configuration is stored in ~/.yudit/yudit.properties.
Global one is in /usr/share/yudit/config/yudit.properties
In yudit.properties look for line starting with
yudit.font.TrueType=
And add the font file name (eg Gargi-1.1.ttf) to the line, like below
yudit.font.TrueType=Gargi-1.1.ttf,Sampige.ttf,arial.ttf,kochi-gothic.ttf, gulim.ttf,
tsckanna.ttf:tscii, dc-font.ttf,code2000.ttf, code2001.ttf:unicode:RL, cyberbit.ttf,yudit.ttf
Using Yudit http://www.indlinux.org/doc/yuditguide.html
Next you need to set the keyboard input. Start yudit ,
You will get a Window like below.

Font (with "A" icon ) : This should be set to TrueType ( Shift - F2 does it )
Input (right of Font ): Clicking this brings up a dialog as shown below.
The Available list contains list of all supported input methods.
For Indic inscript and phonetic keymaps are defined , of the name lang-inscript or lang-phonetic
where lang is 3 letter code for the language eg Devanagari - dev, Kannada - kan , Telugu - Tel
You can assign one input method to each Function key.
Leaving F1 as straight ( ie english ) you can set you language by , selecting the input map
and funtion key to bind to and click the arrow.

On Windows
If you are using Yudit on windows, assuming you have installed in say C:\Yudit
Your configuration will be in C:\Yudit\config\yudit.properties
And Fonts in C:\Yudit\fonts
Rest all you can follow steps as above.
Snapshot from yudit

References:
- http://www.indlinux.org/doc/yuditguide.html
- http://www.yudit.org/download/binary/
Setting up Android development enviornment on UBUNTU
Downloading the Source Tree
Installing Repo
Repo is a tool that makes it easier to work with Git in the context of AndroidTo install, initialize, and configure Repo, follow these steps:
- Make sure you have a bin/ directory in your home directory,
and that it is included in your path:
$ mkdir ~/bin$ PATH=~/bin:$PATH - Download the Repo script and ensure it is executable:
$ curl https://dl-ssl.google.com/dl/googlesource/git-repo/repo > ~/bin/repo$ chmod a+x ~/bin/repo - For version 1.17, the SHA-1 checksum for repo is
ddd79b6d5a7807e911b524cb223bc3544b661c28
Initializing a Repo client
After installing Repo, set up your client to access the android source repository:- Create an empty directory to hold your working files. If
you're using MacOS, this has to be on a case-sensitive filesystem.
Give it any name you like:
$ mkdir WORKING_DIRECTORY$ cd WORKING_DIRECTORY - Run
repo initto bring down the latest version of Repo with all its most recent bug fixes. You must specify a URL for the manifest, which specifies where the various repositories included in the Android source will be placed within your working directory.
To check out a branch other than "master", specify it with -b:$ repo init -u https://android.googlesource.com/platform/manifest
$ repo init -u https://android.googlesource.com/platform/manifest -b android-4.0.1_r1 - When prompted, please configure Repo with your real name and
email address. To use the Gerrit code-review tool, you will need an
email address that is connected with a registered
Google account. Make sure this is a live address at which you
can receive messages. The name that you provide here will show up in
attributions for your code submissions.
.repo directory
where files such as the manifest will be kept.Getting the files
To pull down files to your working directory from the repositories as specified in the default manifest, run$ repo syncrepo
sync and other Repo commands, see Version
Control.Using authentication
By default, access to the Android source code is anonymous. To protect the servers against excessive usage, each IP address is associated with a quota.When sharing an IP address with other users (e.g. when accessing the source repositories from beyond a NAT firewall), the quotas can trigger even for regular usage patterns (e.g. if many users sync new clients from the same IP address within a short period).
In that case, it is possible to use authenticated access, which then uses a separate quota for each user, regardless of the IP address.
The first step is to create a password from the password generator and to save it in
~/.netrc
according to the instructions on that page.The second step is to force authenticated access, by using the following manifest URI:
https://android.googlesource.com/a/platform/manifest.
Notice how the /a/ directory prefix
triggers mandatory authentication. You can convert an existing client
to use mandatory authentication with the following command:$ repo init -u https://android.googlesource.com/a/platform/manifestBuilding the System
The basic sequence of build commands is as follows:Initialize
Initialize the environment with theenvsetup.sh
script. Note that replacing "source" with a single dot
saves a few characters, and the short form is more commonly used in
documentation.$ source build/envsetup.sh$ . build/envsetup.shChoose a Target
Choose which target to build withlunch.
The exact configuration can be passed as an argument, e.g.
$ lunch full-engBuild the Code
Build everything withmake. GNU make
can handle parallel tasks with a -jN
argument, and it's common to use a number of tasks N that's between 1
and 2 times the number of hardware threads on the computer being used
for the build. E.g. on a dual-E5520 machine (2 CPUs, 4 cores per CPU,
2 threads per core), the fastest builds are made with commands
between make -j16 and make
-j32.$ make -j4Run It!
You can either run your build on an emulator or flash it on a device. Please note that you have already selected your build target withlunch, and it is unlikely at best
to run on a different target than it was built for.Emulate an Android Device
The emulator is added to your path automatically by the build process. To run the emulator, type$ emulator
Trouble Shooting
I got the following error while
building
make: ***
[out/host/linux-x86/obj/EXECUTABLES/adb_intermediates/adb] Error 1
I
fixed it by installing following package:
sudo
apt-get install lib32ncurses5-dev
sudo apt-get install libncurses5-dev
sudo apt-get install libncurses5-dev
Before
running the emulator change the permission of file
chmod
777 /home/surabhi/Android/out/target/product/generic/system.img
More details can be found at the following Link :
Monday, 14 May 2012
How do I reset a lost Administrative(root) password?
To do this you need to boot into recovery mode.
Boot up the machine, and after the BIOS screen, hold down the left Shift key. You will then be prompted by a menu that looks something like this:

Hit the down arrow until you select the 2nd entry from the top (the one with the recovery mode in the description) and then hit Enter.

Using the arrow keys scroll down to either root or netroot (doesn't matter in this case) and then hit Enter.
You should now see a root prompt, something like this:
root@ubuntu:~#
passwd command. (In this example I will usesurabhi as the example, you need to substitute whatever the user's username is):passwd surabhi
Enter new UNIX password:
Retype new UNIX password:
passwd: password updated successfully
root@ubuntu:~#
It worked for me.
Reference http://askubuntu.com/questions/24006/how-do-i-reset-a-lost-administrativeroot-password
Subscribe to:
Posts (Atom)